How To Use Custom Experiences To Convert More Leads & Sales

David Frosdick
Last Updated: January 17, 2023
We have just added a new feature to OptimizePress called "Custom Experiences" that makes targetting your marketing message a lot easier.
This new feature lets you change a web page's content based on different criteria.

We're back with another exciting update to shout about. It's time to show you a new toy built directly into our page builder that can dynamically switch content on your pages.
Want your web pages to generate more leads and sales?
Read on...
Showing the right message, to the right person, at the exact moment they visit your site instantly increases your chances of converting visitors into customers.
You can build more of a connection with visitors by simply tailoring your message so that people feel like you are speaking directly to them. Showing content relevant to their niche will keep visitors on your pages longer and entice them to scroll more.
Marketing wisdom dictates the more specific you target your marketing, the more you will sell online.
We have just added a new feature to OptimizePress called "Custom Experiences" that makes targeting your marketing message a lot easier.
This new feature lets you change a web page's content based on different criteria.
Read on to learn more.
Custom Experiences Walkthrough
Here's a quick video explaining how Custom Experiences works and examples of how you might use it best in your business.
The Scenario
For example, let's say you run a marketing agency helping SaaS companies with growth.
You also want to help startups and app developers, but targeting three audiences on the same page could confuse people and lose potential leads.
You start making a landing page but don't want to mention all these groups of people, so you come up with a headline broad and fluffy that appeals to most SaaS companies and startups...
Example headline:
Discover how we 10x your MRR for Startups, App Devs & SaaS
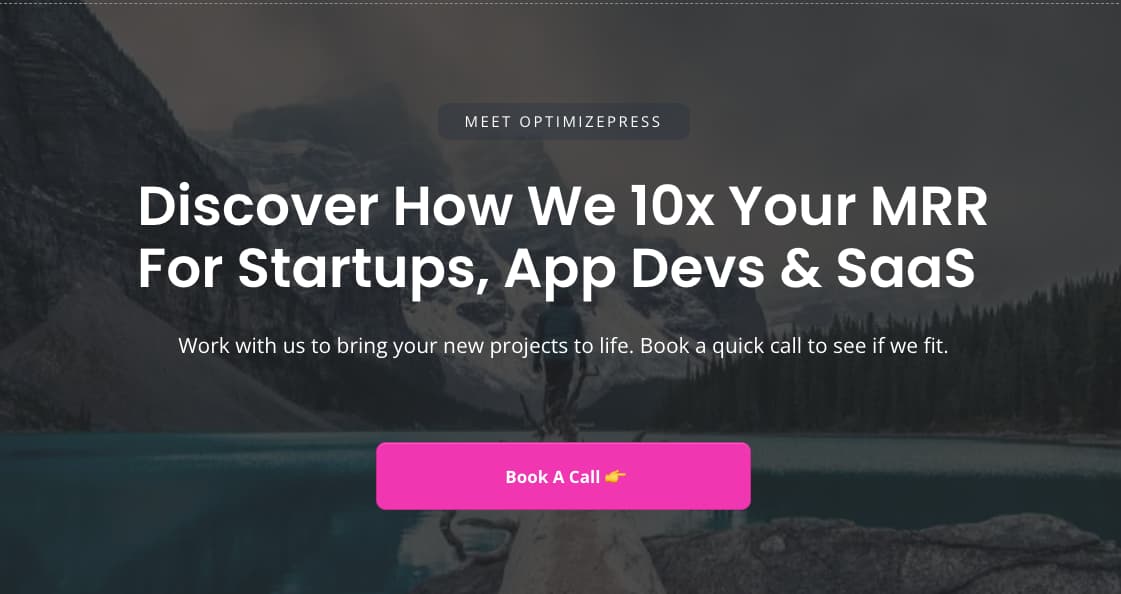
Still with me? The problem is you have an average headline because it doesn't speak directly to each target group you want to reach. We know that talking specifically in marketing rather than generally is proven to increase conversions.
You could create different versions of your landing page with elements such as headlines and bullet points targeted to the specific audiences you are trying to convert into leads, but this means creating and managing multiple pages.
If you would like an easy way to target one landing page to multiple different audiences, we have the solution.
The Solution - Custom Experiences
Using our new Custom Experiences feature, we have made it so you can use one single landing page and switch what content shows to visitors based on variables like page, post, time, date, URL and more.
The easiest way to explain this new feature is to pick a common use case, such as changing the headline that shows to visitors based on the URL the customer visits.
Why do I like this so much?
When you start using UTM codes or different refer URL's you can track people on your web pages and, using our new Custom Experiences feature, show different headlines to different people based on how they came to your site. 🙌
To briefly explain how it works.
We create a new Custom Experience for each headline we want to show to visitors.
We then add a condition to show the Custom Experience that matches a certain URL.
Example:
- Default Headline:
We Grow Your Company Without Ads
- Condition:
This headline shows to all vistors that don't meet any of the Custom Experiences.
- Headline 2:
We Grow SaaS Companies Without Ads
- Condition:
Show headline 2 if condition URL matches headline and saas
- URL string:
www.yoursite.com?headline=saas
And so on.
Don't worry if that doesn't make sense now. We cover all this in the video and show the "how-to" part further down.
How It Works
Now for the technical bit.
You create criteria for Custom Experiences to function on your pages.
Think of it as:
Show/Hide When X happens, then do X when X
Show/Hide When X date is Monday 8 pm
Show/Hide When the domain is X
And lots more...
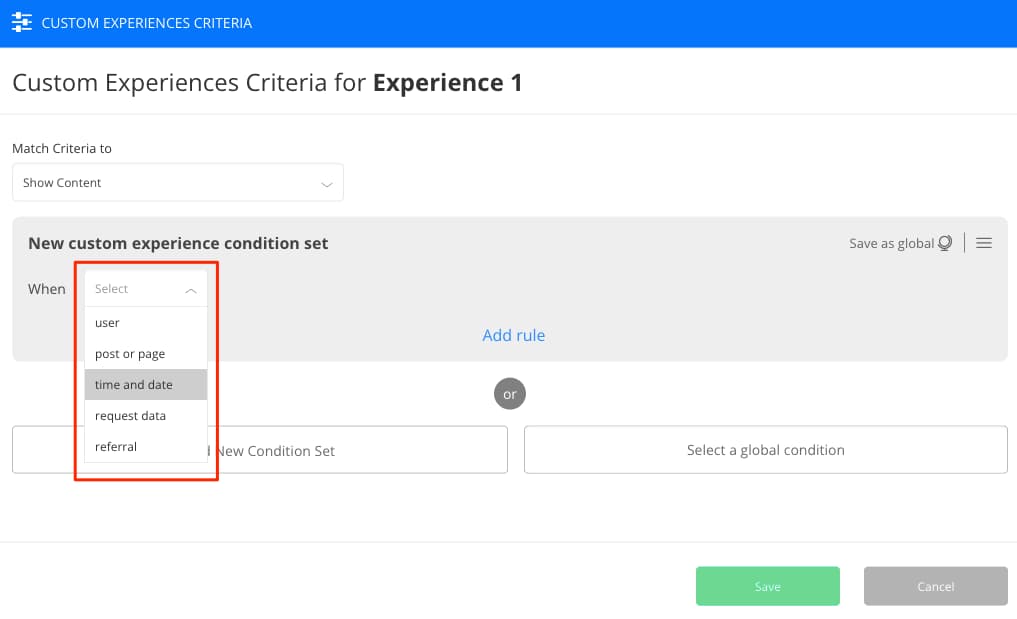
The starting criteria will begin the trigger to complete an action.
These are based on how WordPress manages its content.
Each trigger will run on the different conditions you set for that particular Custom Experience.
User roles - Is logged in, is not logged in, role, registration date, name, number of comments.
Post or Page - Control which pages, title, category tag, status, author and more.
Time & Date - Set dates, times, days of the week, days of the month and month.
Request data - Cookie, post variable, URL query string.
Referral - URL, domain, post, page, category, tag.
Examples To Implement
Now for the fun part. How might you use this new feature for marketing your business?
Here are some examples to get you thinking.
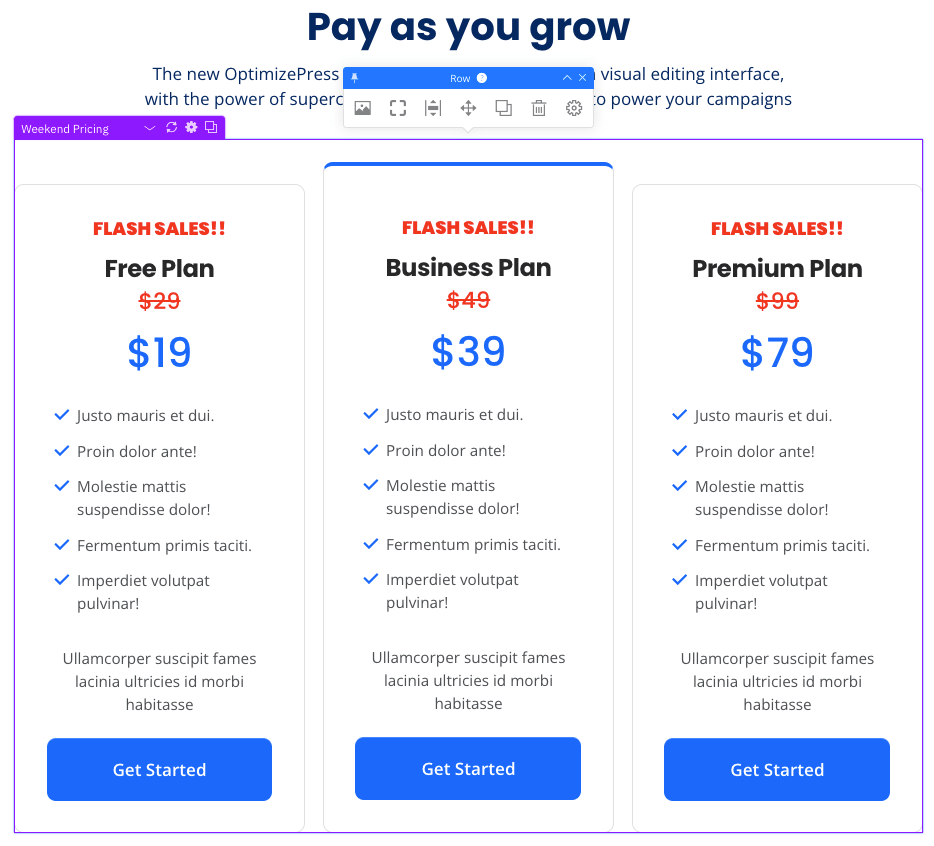
Switch Pricing
Want to run a flash sale at the weekend? Create a date based condition to switch the content.
You could even show different product prices to members logged in to your membership site.
Switch Videos
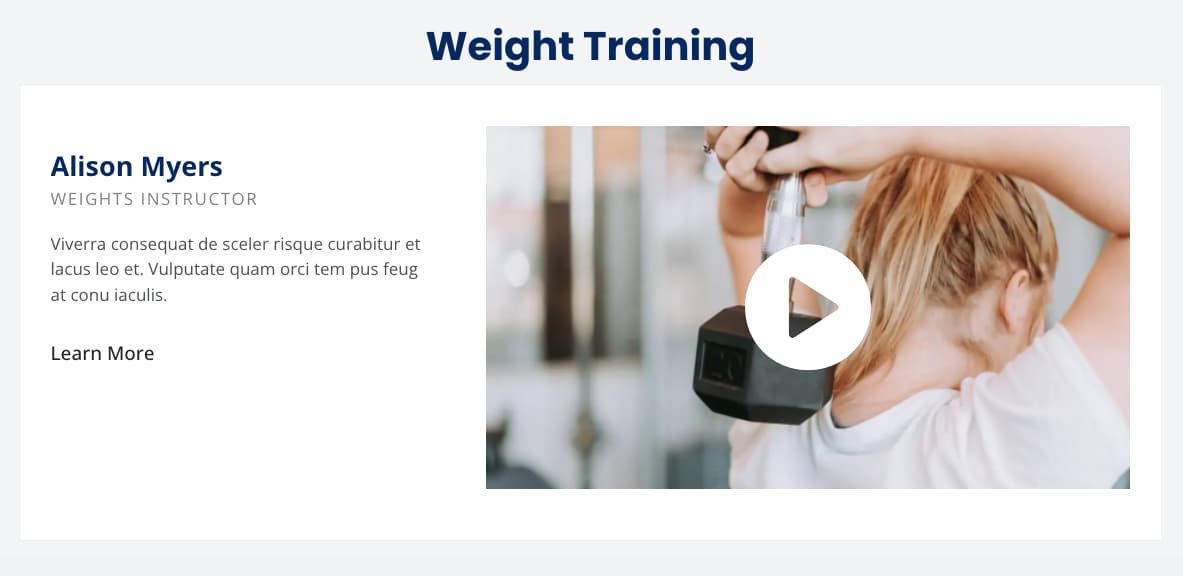
Have a free fitness email series? Change the fitness videos that show on a page based on URL or date.
Monday is Yoga class. Great! Set the content to load on Monday.
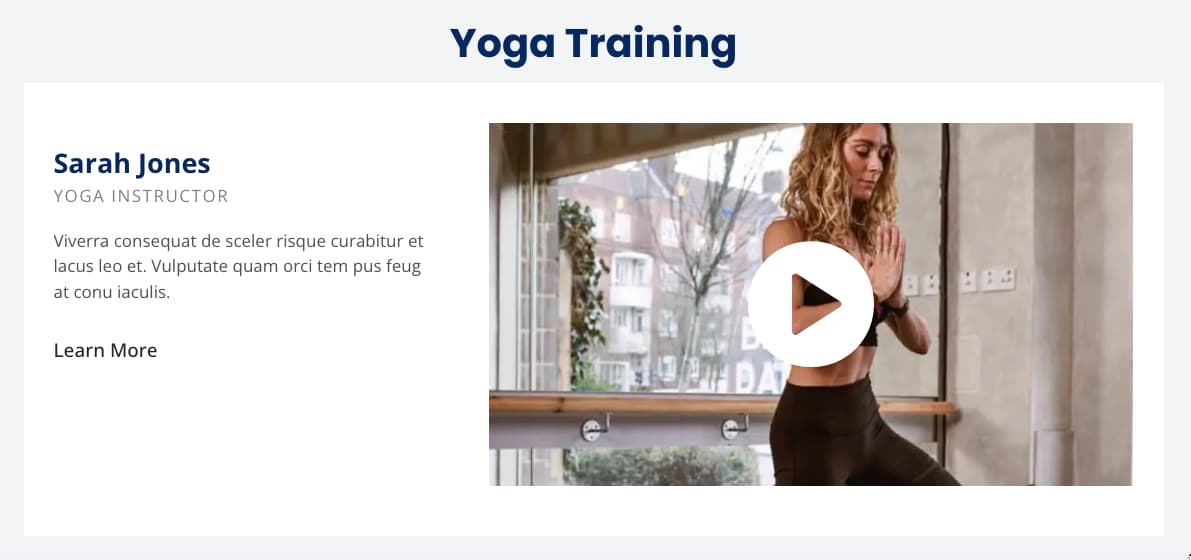
Switch the video for Strength, HIIT, Weights and more.
All your videos can stay on one page. Just switch the content around.
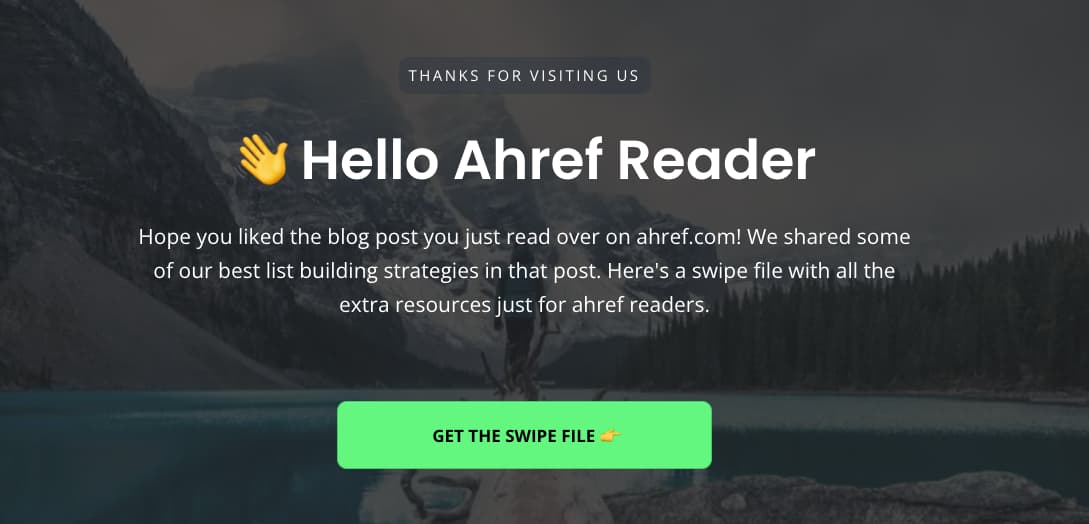
Thank Readers
Have you written a guest post for another site?
Give them a specific URL to add to your guest post that links back to your site.
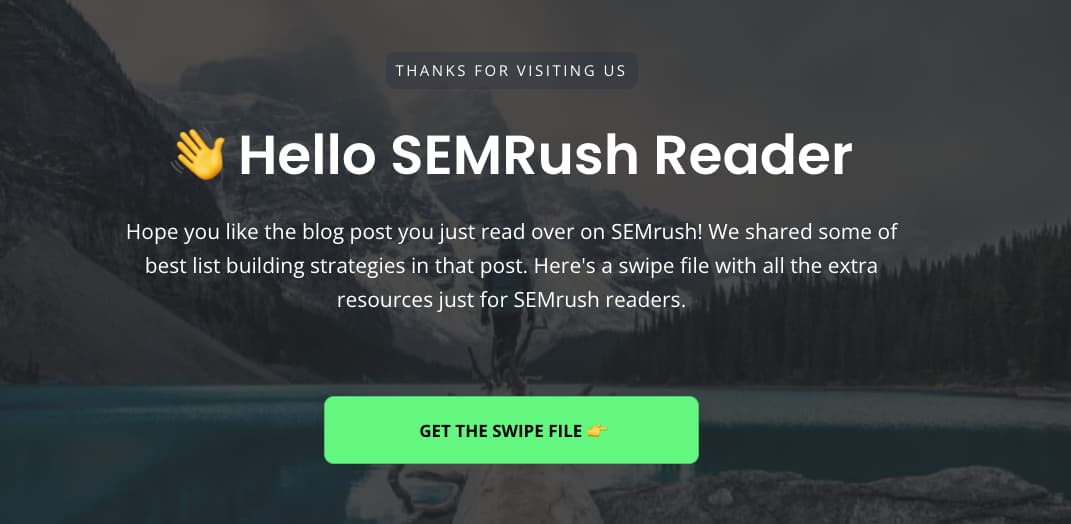
Have you written another guest post for a different site?
No problem.
Change the URL condition.
Here are more examples for using this feature.
I hope you see the power of this feature now!
How To Create Custom Experiences
To do this in OptimizePress, you first must use a Row or Section. It doesn't work on individual elements or columns.
Firstly select the Row or Section.
Click the Settings icon > Advanced Options > Then look for Custom Experiences in the sidebar.
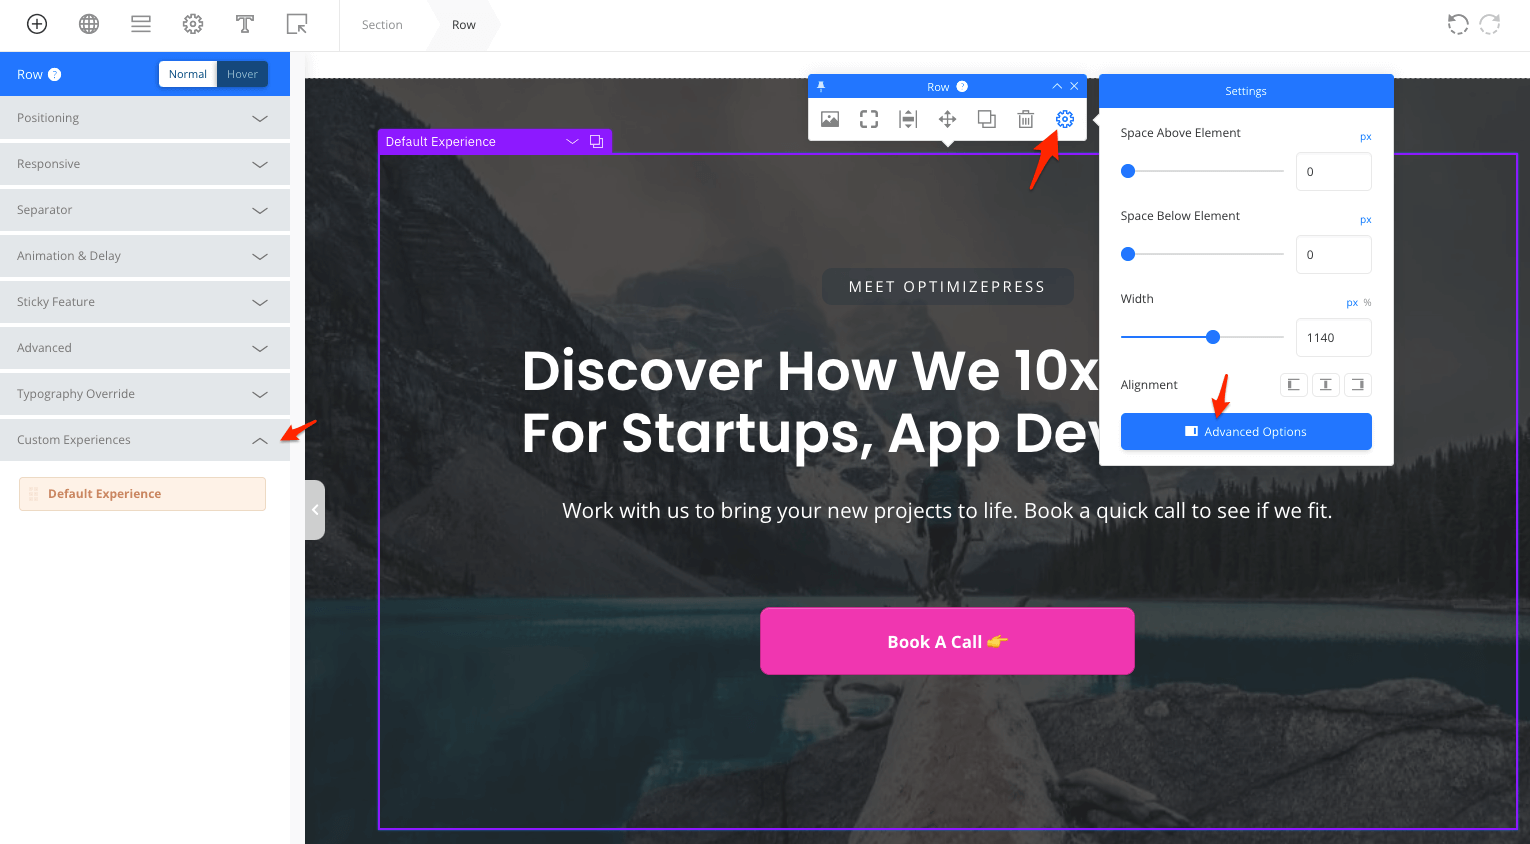
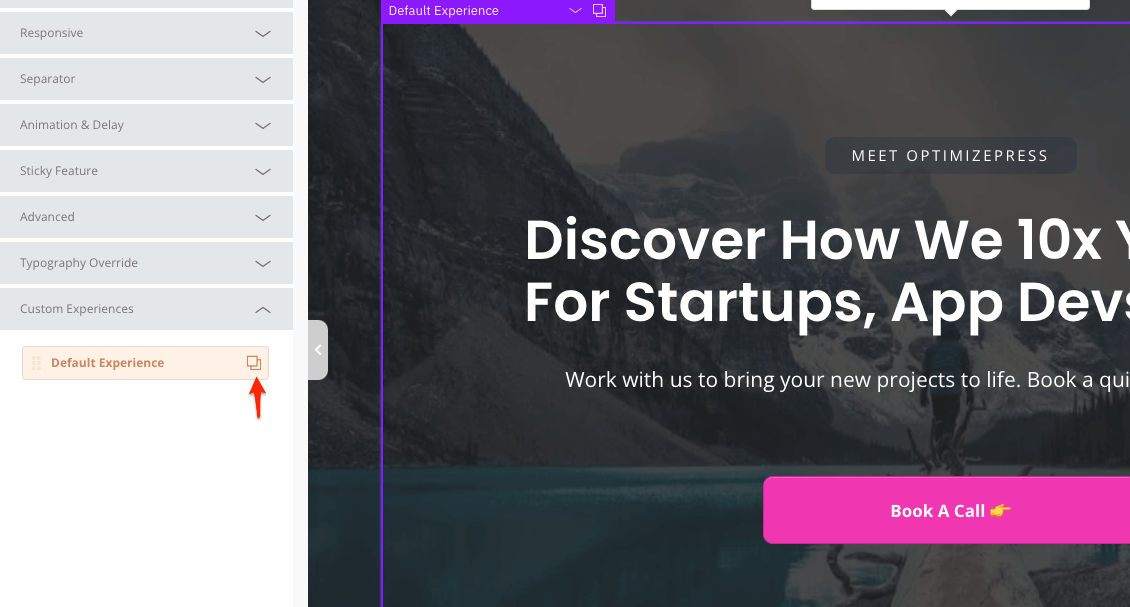
Next, click the clone icon to create Experience 1 - You can rename this experience. Watch the video above to see how to do this.
You can click the clone icon again to add additional Experiences. They will be named sequentially - Experience 2, Experience 3 and so on.
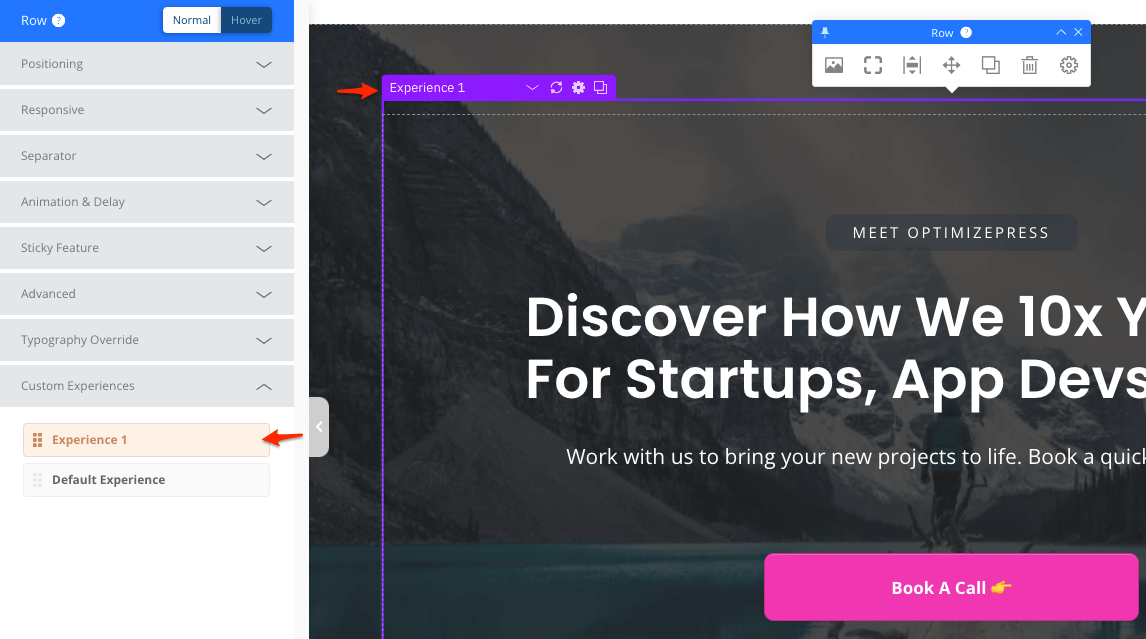
Now select Experience 1 in the sidebar, and it highlights the layout element for you to edit the content.
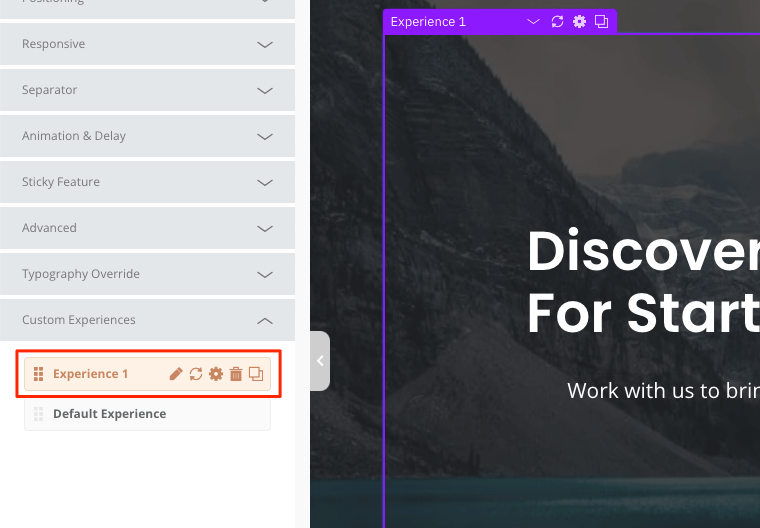
When you hover over each Custom Experience in the sidebar, you will see options to edit, reset, settings, delete and clone.
Click the pencil icon to rename each Custom Experience. It would help you if you did this to keep things organised.
You can switch between Experiences using the small options menu that appears on active Rows or Sections. Renaming them before helps organise your workflow here.
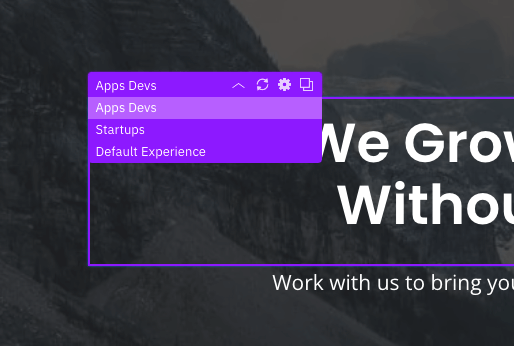
The Default Experience is what shows as default on the page. The conditions are added to the other Experiences (Experience 1, Experience 2...)
Choose default and start adding your content.
Going back to our scenario at the start of this article, let's create headlines for each different niche we want to target from our ads.
The example headline below is for SaaS companies.
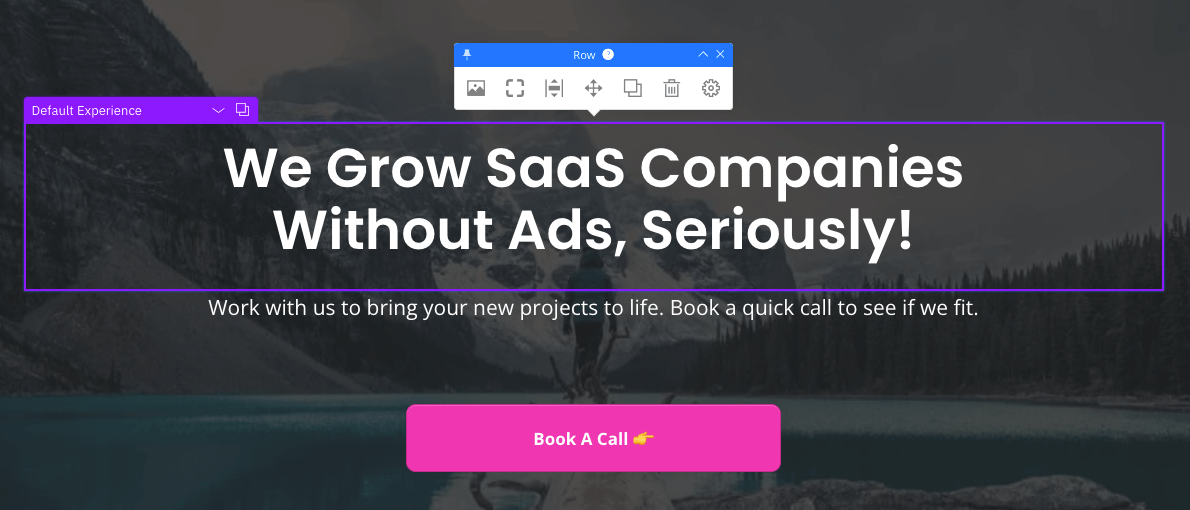
Create another Custom Experience (on the same row as before) and write a different headline.
Your next headline is for Startups.
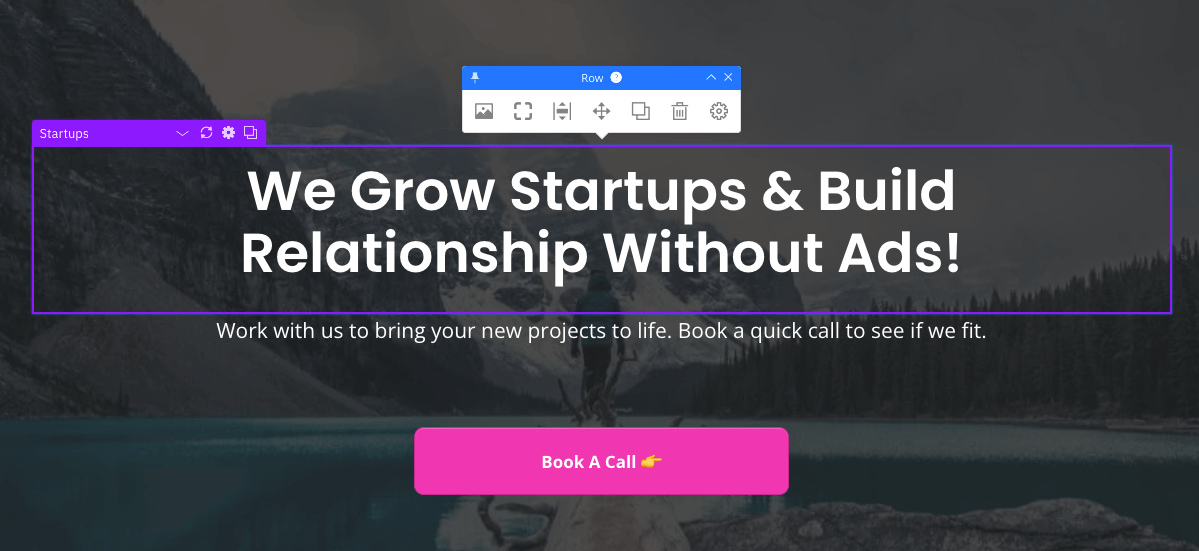
Create another Custom Experience (still on the same row) and write a different headline.
Your next headline is for App Developers.
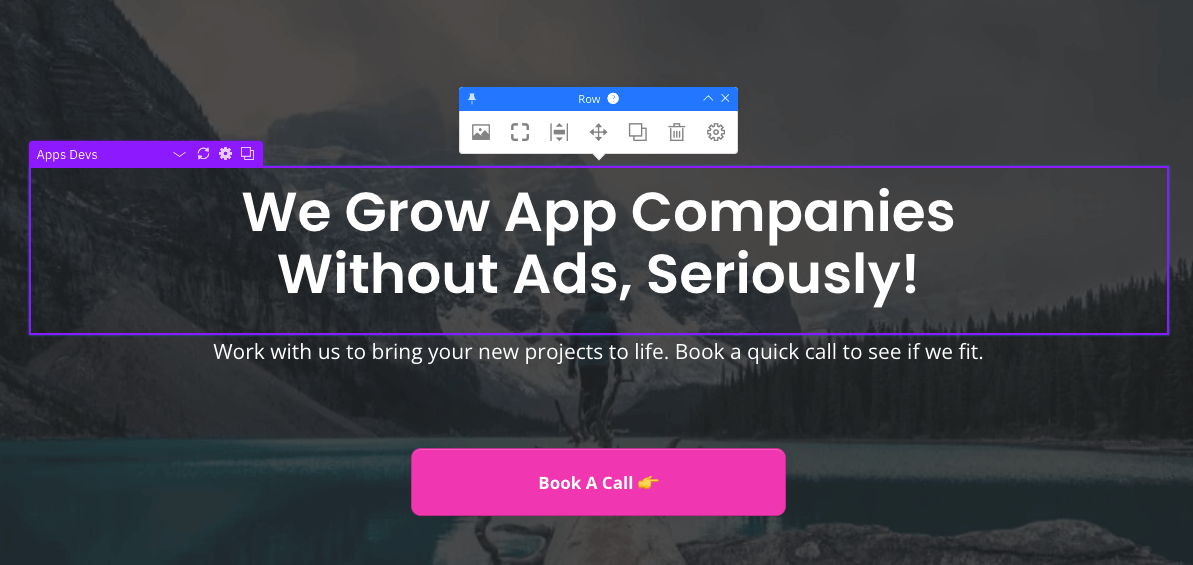
You can make as many Custom Experiences as you like.
See where we're going this?
We have three headlines within one row, all on the same page.
Next, we have to create the conditions for each headline to show.
When viewing the active Custom Experiences on a row, click the cog icon to open the conditions page for that Custom Experience and begin setting the criteria.

Each Custom Experience has its own condition criteria.
After clicking the cog, you see this:
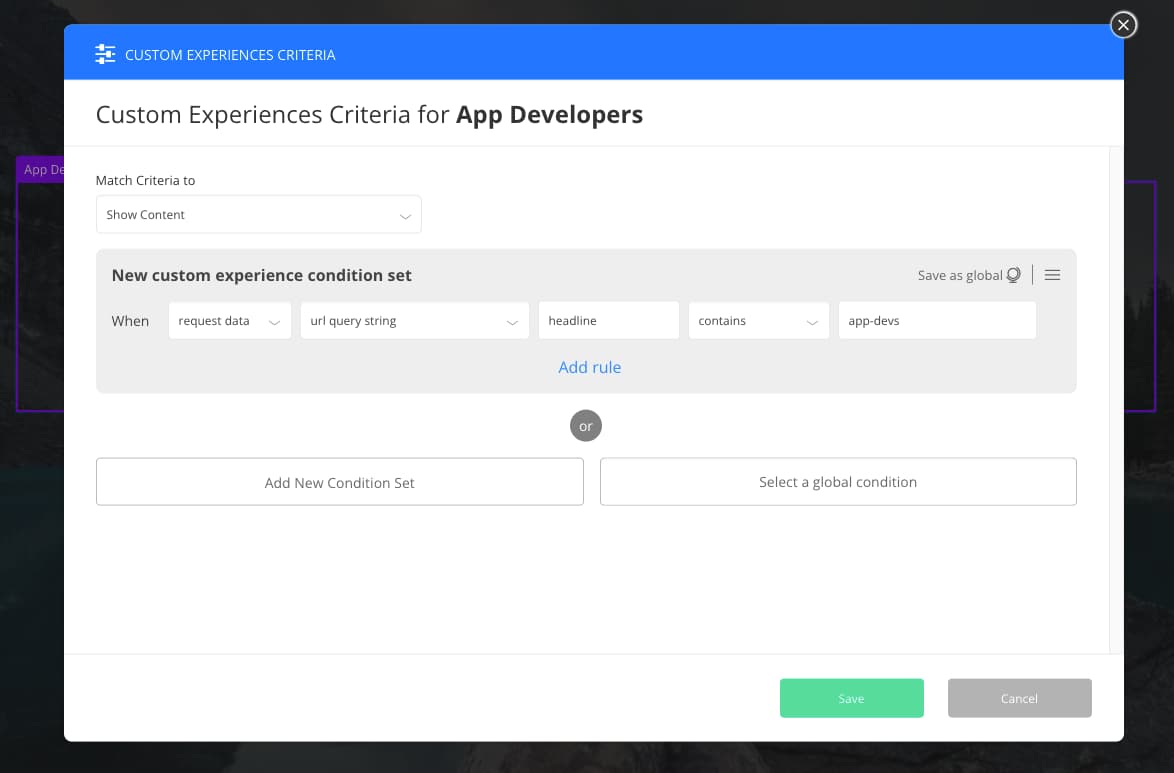
This condition above uses the Request Data rule.
When URL string matches headline and app-devs.
The URL string can be anything you want.
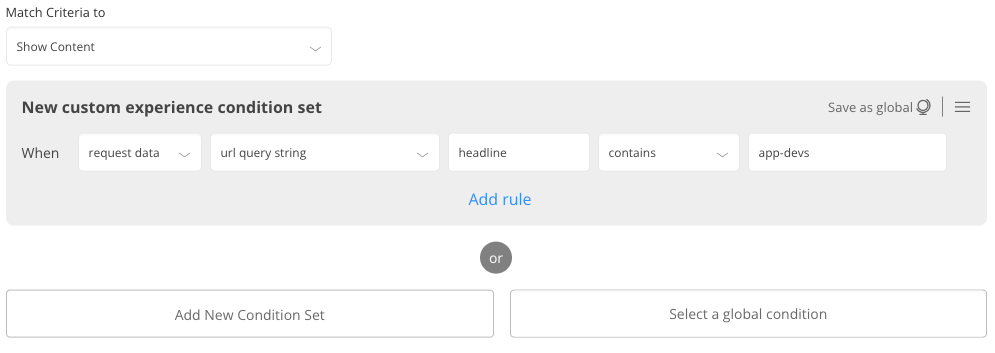
This rule above would trigger the content using the URL:
www.yoursite.com/?headline=app-devs
This would display the following headline:

Notice the part of the URL: ?headline=app-devs
To display the SaaS headline, we use:
www.yoursite.com?headline=saas
Using This Feature For Facebook Ads
To be sure you understand the power of this feature, we recommend you watch the video walkthrough that covers the features in more detail.
If you want to use the URL based condition with your ad network, you could follow the same steps above to create your Custom Experiences, then set the URL conditions for each experience you want to show.
Inside your Facebook ads edit page, enter the main URL of your landing page.
This would also be the Default Custom Experience.
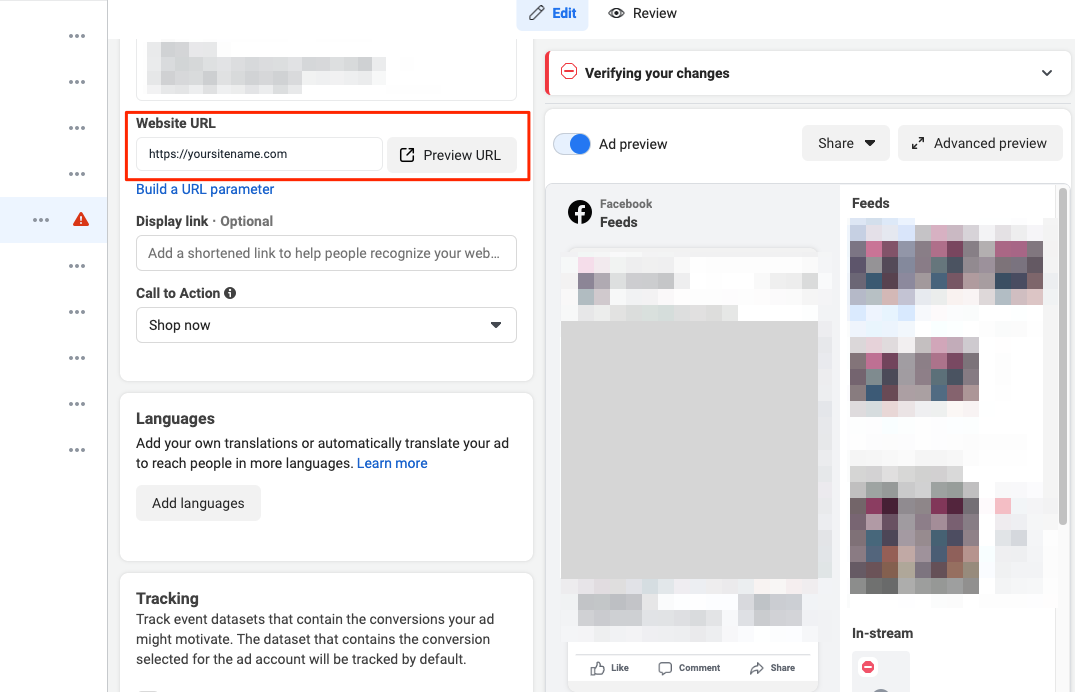
Next, scroll down to the URL parameters field and enter the URL string for your condition.
The example here:
www.yoursite.com/?headline=startups
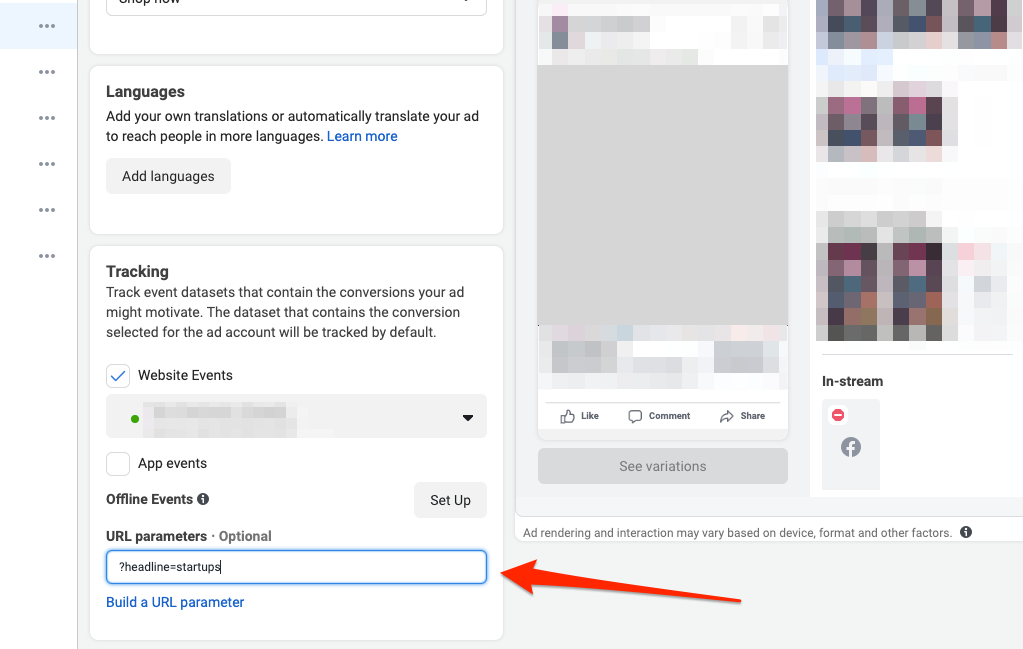
Anyone who clicks my ad navigates to:
www.yoursite.com/?headline=startups
You can now create different ads using the URL parameter field to switch content on your page based on the string you make up.
Remember, my URL is an example, "www.yoursite.com/?headline=startups"
You could have anything as your URL string.
www.yoursite.com/?headline=ebook
www.yoursite.com/?leadmagnet=free-course
www.yoursite.com/?leadmagnet=call
www.yoursite.com/?ads=reddit
www.yoursite.com/?email=launch-video1
Don't just use the URL example. Try out date and time switching and any of the other options.
Membership Site Usage
With the upcoming launch of our OptimizePress Membership plugin (OptimizeProtect), Custom Experiences will be a powerful way to show, hide and personalise your membership site for every customer.
You will be able to change content for different membership levels and lots more. Here's are some other ideas:
Once you have a fully functioning membership site, the Custom Experiences feature will change the user experience for each member based on different links they click or criteria you set for each member.
Your members will feel like your site is built just for them.
How Will You Use It?
The new Custom Experiences is super powerful and creates many ways you can switch and display content securely and secretly on your pages.
Please share below how you will use this feature, and we can add your suggestion to the list of ideas.
Want to convert more leads & sales?
OptimizeUniversity gives you the latest marketing training courses, strategies & tactics to grow your business fast.


4 replies to "How To Use Custom Experiences To Convert More Leads & Sales"
Just keep in mind that we still need the ability track the effectiveness of this. In the end of the day, we are trying to find out if such customization is bringing in us more money or not. Nevertheless, good feature for sure!
This is awesome! 🙂 Something I’ve been waiting for a long time to have on the OP3 builder. Now, I can use it to customize the journey someone starts with me based on their entry point. Not everyone’s journey is the same and being able to meet the lead, prospect, customer, or client where they are in my little ‘world’ makes all the difference online. I would love to figure out how to use this as a conditional logic type function if someone clicks on a button in a row or section then I can have custom sections or rows show depending on their microstep taken on the click.
Will definitely use this on ads to drive leads to the right message. I think I understand how this would be used for blog posts and pages, so I would be using it internally to guide the journey and target the message to the right market.
Thank you for adding this to the builder. Such a great feature!!
This is great, I’ve been looking for a plugin that does this but now I don’t have to look anymore because it’s all there inside OptimizePress! Also kudos for the user interface, finally a clean way to show conditional content in the editor without the need to display all the variants under each other.
This is a great addition. Thank you OP Team for your continued effort to make OptimizeBuilder a great web design platform.