OptimizeFlow - Automate WordPress tasks in Seconds

by Onder Hassan
Last Updated: August 25, 2023
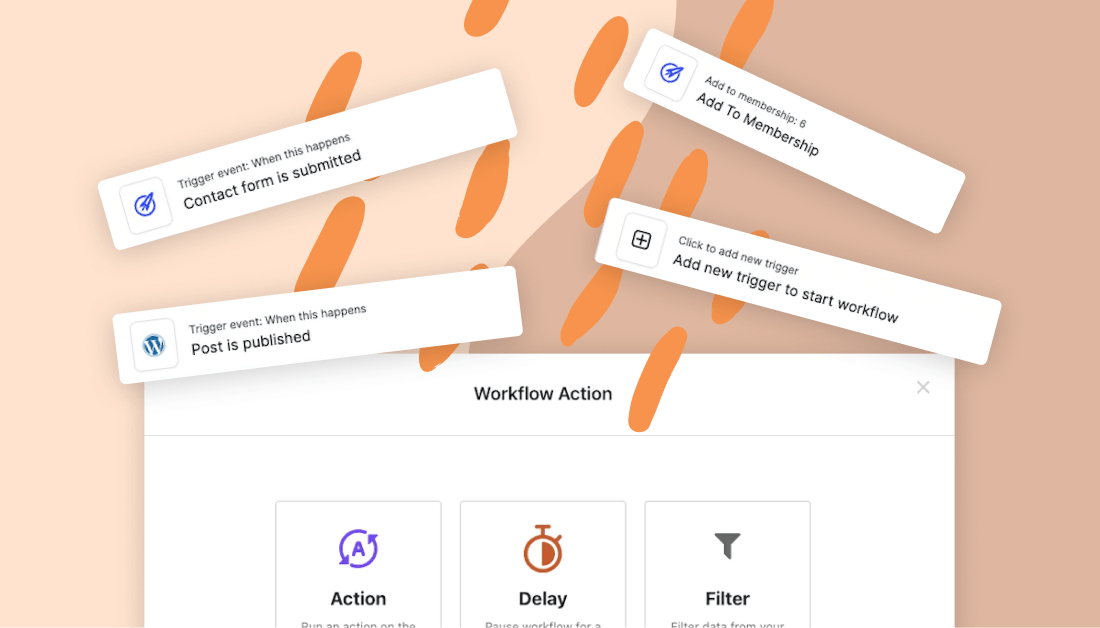
Today, we’re happy to announce the launch of a brand new tool that will completely transform your OptimizePress Workflow.
OptimizeFlow is designed to help you streamline routine tasks inside your WordPress website.
By using workflows inside OptimizeFlow, you will be able to setup automatic processes that happen when certain events are triggered on your website.
If you’re currently using tools like Zapier or Make to pass information between WordPress and your other tools, OptimizeFlow will help you reduce your reliance on external tools, saving you money and resources that you can use to scale your business and make more sales.
What is OptimizeFlow?
OptimizeFlow allows you to run a wide range of workflows when a website
visitor, course member or customer takes a particular action. These actions might include adding a new subscriber to two different autoresponders or sending data via a webhook.
As we explain further in this post, there are lots of ways you can use OptimizeFlow to promote and grow your website visitors, subscribers and customers.
This simple-to-use and powerful tool is available in all OptimizePress packages.
Please Note: OptimizeFlow is a brand new platform that replaces the original Rules Engine. Any existing rules made with the Rules Engine have automatically moved into OptimizeFlow.
The OptimizeFlow Dashboard
OptimizeFlow includes a beautiful interface that makes building new workflows a breeze.
We kept the design minimal so you can easily navigate and manage your workflows.

Your workflows will be neatly listed and organised allowing you to have a quick glance over what’s currently active, freely turn them on or off and make quick changes on the fly with minimal downtime.
How To Use OptimizeFlow
As with all of our tools and features in our OptimizePress Suite, we’ve ensured that you are able to get up and running as quickly as possible by removing all of the technical complications that you might find with other third-party tools.
With OptimizeFlow, a typical workflow is simply made up of two key events - A Trigger and an Action.
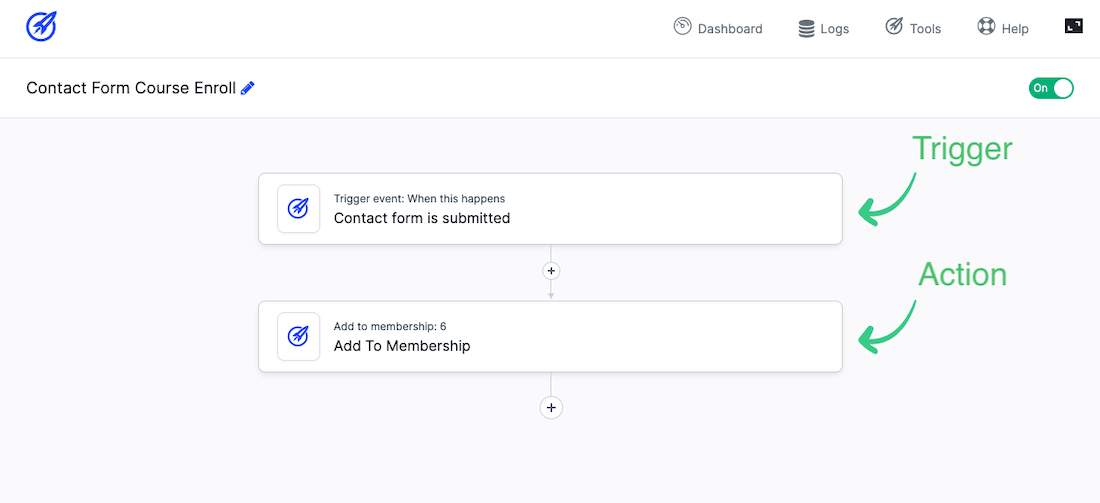
The trigger is what starts the process of your workflow. Our system will listen for this event happening on your WordPress website or incoming data to a webhook coming from an external service.
An example trigger could be:
Using the initial trigger event, you will then have the ability to set a resulting action that you would like to happen.
Some examples might include:
We’ve opened the floodgates by providing you a range of actions out of the box so you can get the ball rolling.
Getting Started
Clicking on the blue ‘Create New Workflow’ button on the main dashboard will launch a new workflow.
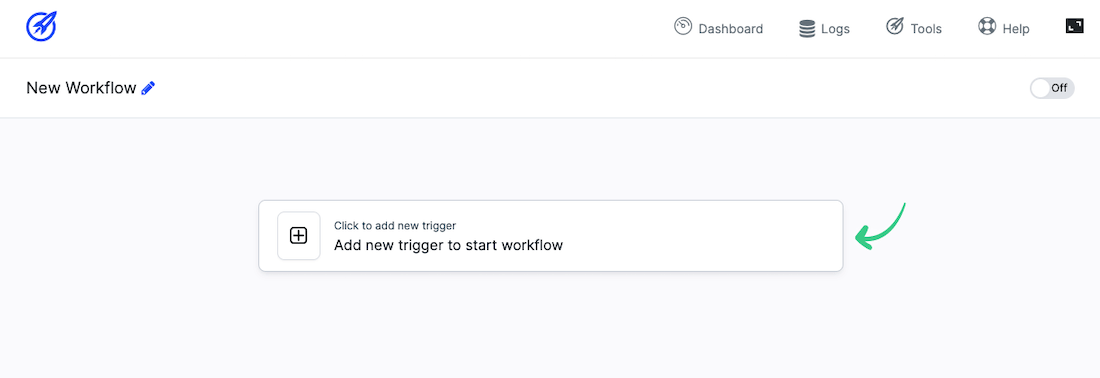
Clicking on the new trigger will launch the trigger event popup, allowing you to begin setting up your new trigger.
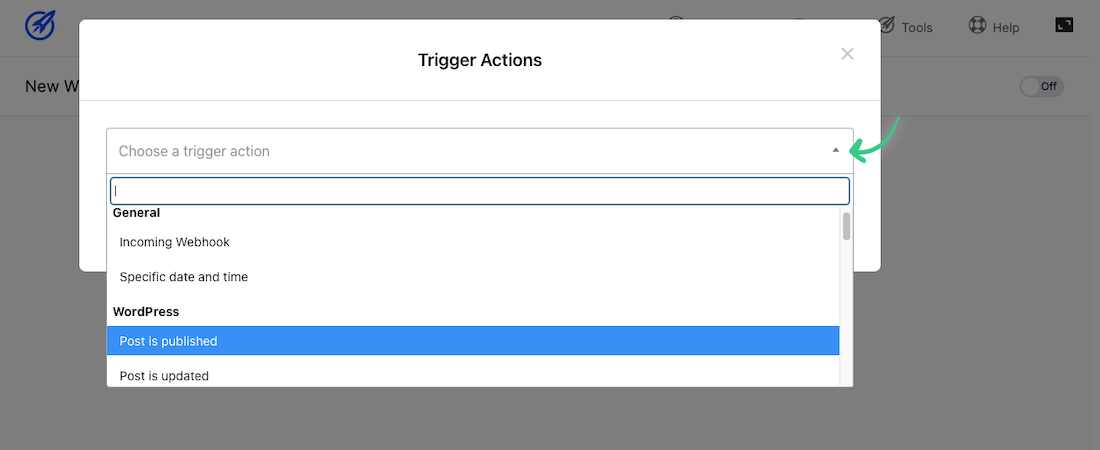
Here, you will be able to select from a preset trigger by clicking on the dropdown icon.
Depending on which trigger you select will determine which options will be displayed in order to complete the trigger setup process.
Clicking on the blue ‘Save Trigger’ button will confirm your selections and can easily be edited by selecting the initial trigger on your trigger dashboard.

With your trigger setup, clicking on the ‘+’ icon will launch the Workflow Action popup to begin its setup process.
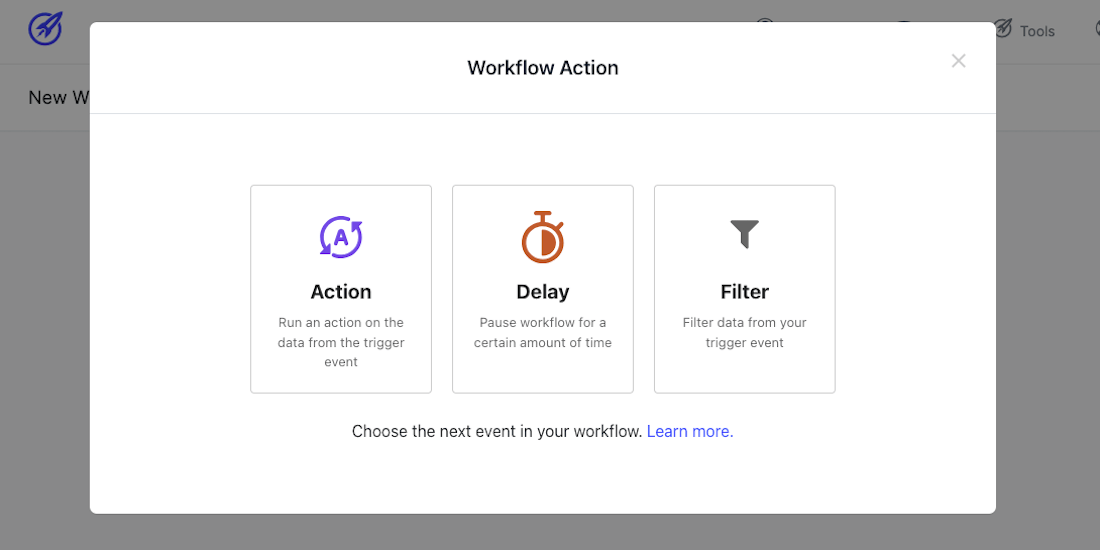
In addition to the Action selection, you are also able to setup a filter and a delay in order to set a delay before an action in your workflow is triggered.
Selecting the delay option will allow you to set a delay in minutes, hours, days, weeks or months.

An example of a 3 week delay
Filtering options allow you to filter by date/time, day, month or year and can add multiple filters depending on your specific requirements.
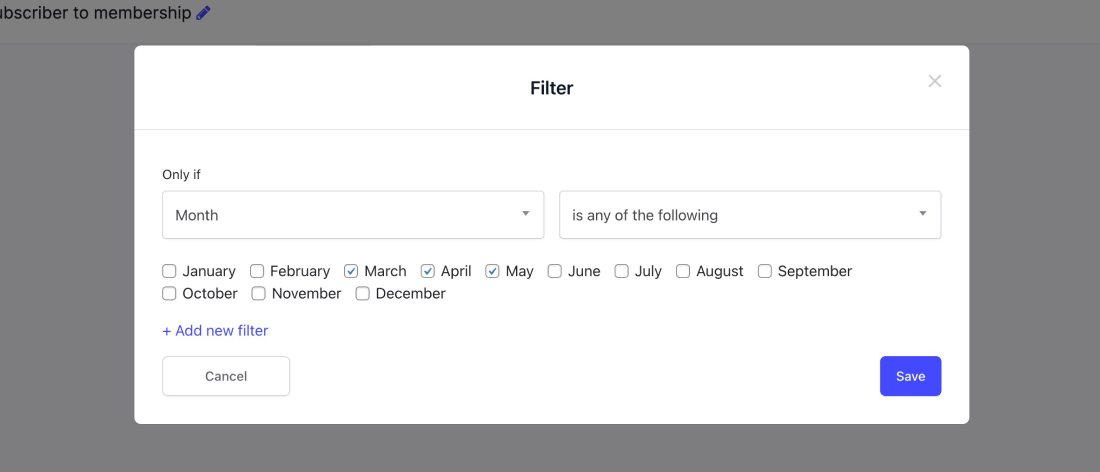
A filter that triggers an action only if it matches the months corresponding March, April or May
Selecting the Action selection will display a popup to begin setting up your actions.
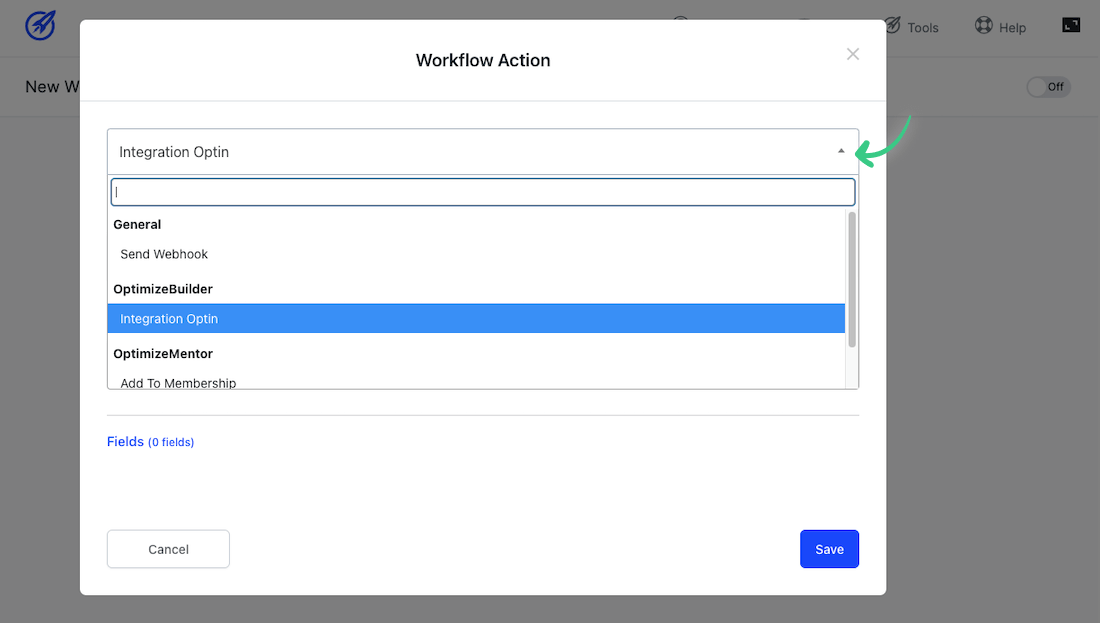
Clicking on the dropdown will give you a list of integration options to choose from. Further options will be displayed depending on the initial selection.
You can also add custom fields in order to send additional data.
Once you’re happy with your selection, clicking on the blue ‘Save’ button will save your selections and complete the workflow.
As you can see, with just a few clicks and in just a few minutes or less, you will be able to quickly and easily setup a brand new workflow that you can start to utilize in your business immediately.
What Can You Do With OptimizeFlow?
With the power and flexibility of OptimizeFlow, the potential of what workflows you can add to your workspace is limited to your imagination.
But to get your creative juices flowing, here are some example scenarios to help get you started.
Adding a contact to multiple CRMs or email marketing systems
Would you like to add your email subscribers to multiple email lists?
With OptimizeFlow, you will be able to quickly setup multiple workflows that each integrate to its own email marketing platform.
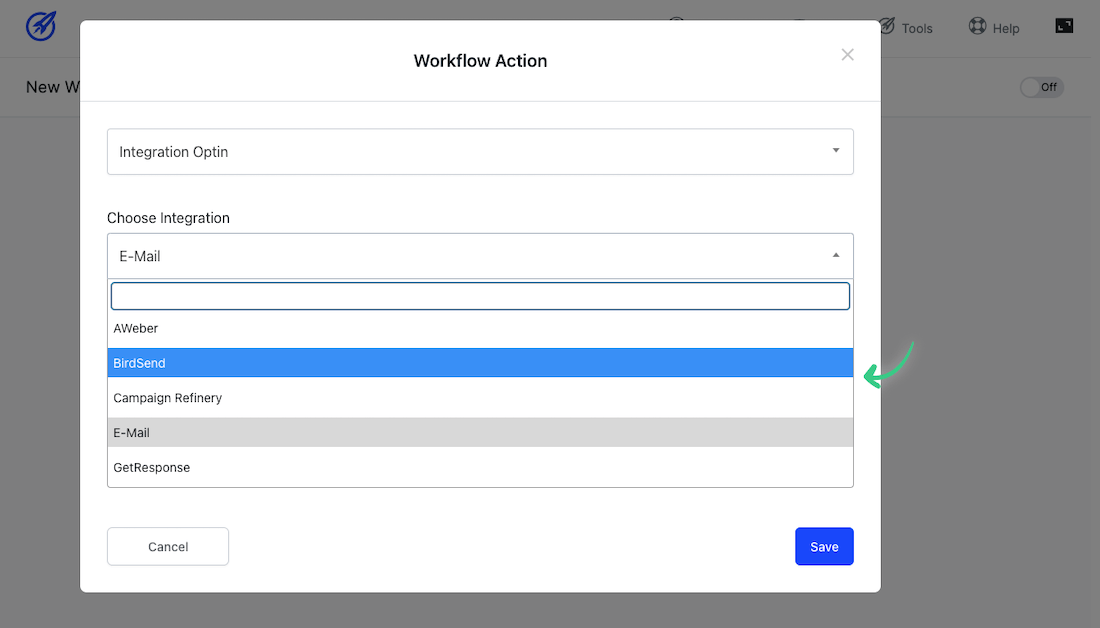
By clicking on the Integration Optin selection in the Action setup area, you will be able to select from the list of integrated email services that you will have initially setup inside your OptimizePress dashboard.
Adding a new subscriber to a free membership
Would you like to offer new subscribers a free course as a valuable lead magnet?
Giving away something extremely valuable can completely transform your optin rates. And with OptimizeFlow, you now have the ability to do that by giving new email subscribers exclusive access to a course built inside OptimizeMentor.
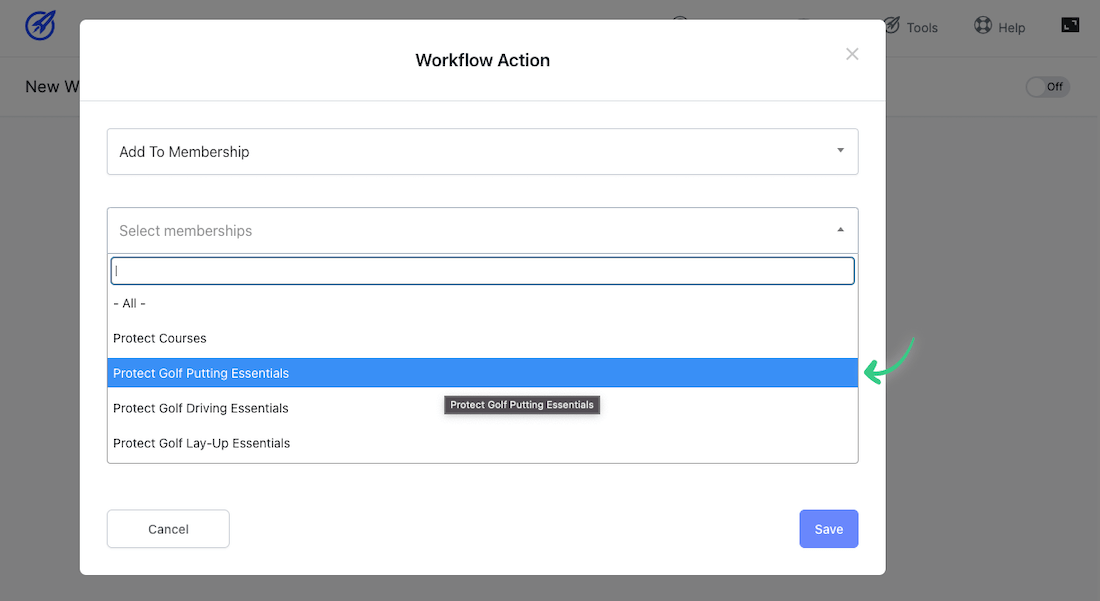
By selecting the Add to Membership action inside the Actions setup, you will be able to select from any of your existing courses inside OptimizeMentor that you would like to send your email subscribers to on optin.
Your subscribers will instantly be sent login details, allowing them direct access to your course.
Give readers limited-time bonuses for engaging with your blog posts at a specified date
Would you like to increase reader engagement and improve your search rankings?
Having highly engaged readers who are actively interacting with your blog posts is a key indicator for Google to determine where to rank your content. This will lead to higher rankings, more traffic and increased sales.
You may also be running a limited-time promotion and would like a way to incentivize interaction by giving away a free bonus.
Using OptimizeFlow, you will be able to quickly setup a filter to trigger an action when a reader leaves a comment at a specified date, generating urgency and scarcity, which will encourage your readers to engage.
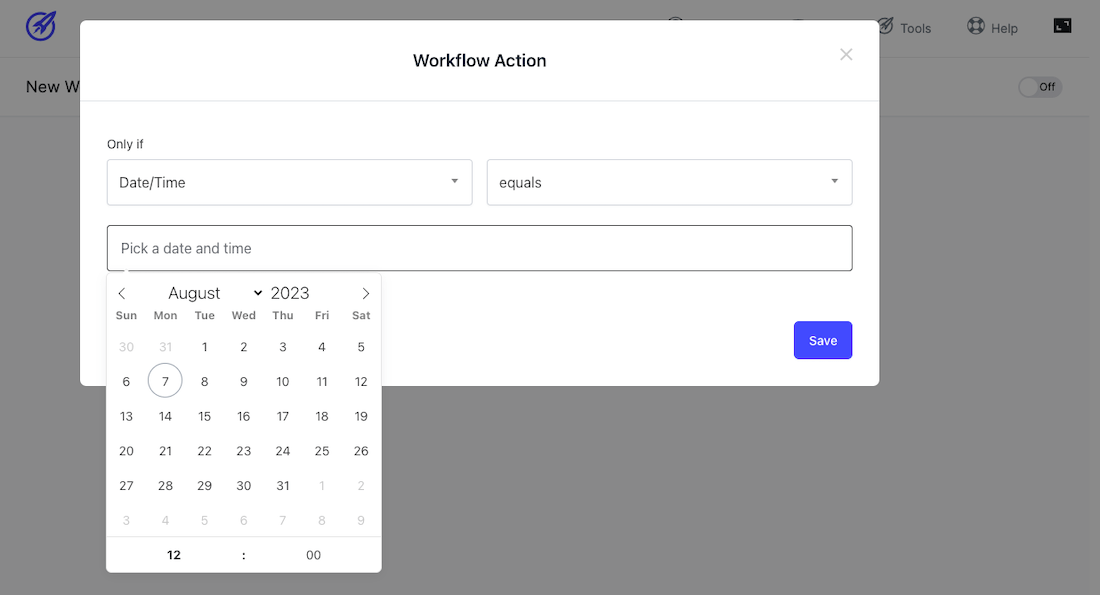
Using the filters option in Action settings, you can easily setup a filter to only trigger an action at a specified date and time.
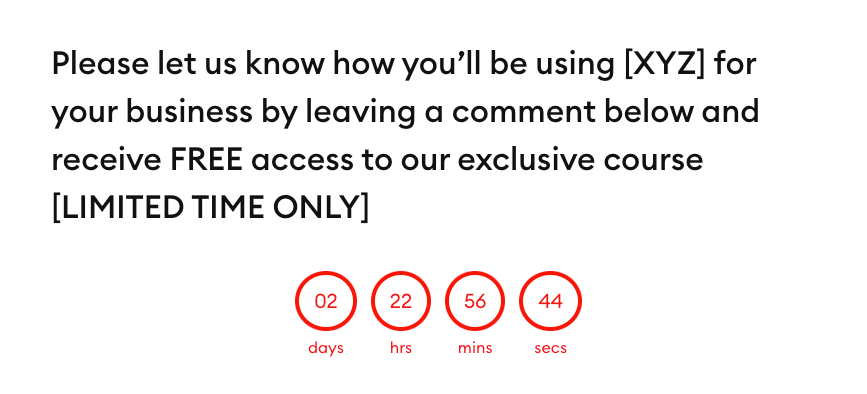
Adding a message below your post prompting readers to comment along with a Countdown Timer element in OptimizeBuilder will create more urgency and encourage them to comment and take action.
Now all you need to do is hook up an integration action to add commenters to a specific tag or list inside your CRM, or connect to OptimizeMentor to add access to a course (see above).
Move an existing database of users from a spreadsheet into an autoresponder or course
Do you have a spreadsheet of interested customers that you would like to send to a course or service?
With OptimizeFlow’s Incoming Webhook trigger, you will be able to connect to an external service using a unique Webhook URL and listen and collect the data that you can utilize as an action inside the tool.
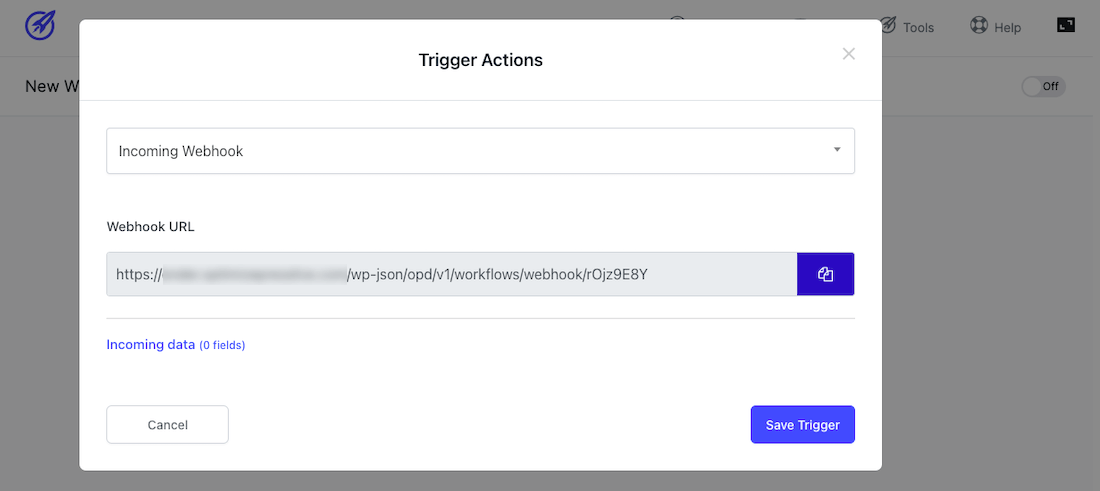
The power and flexibility of a Webhook means you can connect to many other external services from the front end and use it to move the data gathered inside your OptimizePress setup. Here’s some additional ideas:
These are just a few of the many use-case examples that you can setup to create powerful workflows inside your business that was previously not possible.
Triggers Currently Available
Included with OptimizeFlow is a range of triggers that you will instantly have access to right out of the box, allowing you to begin setting up your new workflows.
Please Note: Our launch version currently includes core integrations and triggers, but we’re rapidly expanding the range of features available and we’ll be actively listening to feedback to discover the actions and triggers you’re looking for.
General
Incoming Webhook
Workflow is triggered when your incoming webhook receives data from an external source.
Specific Date & Time
Workflow is triggered at a specified date and time.
WordPress
Post is Published
Workflow is triggered when a new post is published on WordPress.
Post is Updated
Workflow is triggered when an existing post is updated inside WordPress.
A Comment is added to a post
Workflow is triggered when a visitor leaves a comment on a blog post.
User logs in
Workflow is triggered when a user is logged into your WordPress site.
User logs out
Workflow is triggered when a user logs out from your WordPress site.
User resets password
Workflow is triggered when a user/customer resets their password.
User registers
Workflow is triggered when a user registers to your WordPress site.
User role is added
Workflow is triggered when a user is assigned a role inside your WordPress website.
OptimizeBuilder
New Subscriber (subscriber added from optin form)
Workflow is triggered when a subscriber is added through an optin form on your landing page. You can also choose optins from a specific page for increased control.
Signup form is submitted
Workflow is triggered when a signup form is submitted on your website.
Contact form is submitted
Workflow is triggered when a contact form is submitted on your website. You can choose a contact form on a specific page and even a specific contact form by ID.
OptimizeCheckouts
Payment successful
Workflow is triggered when a payment is successfully completed by a customer.
Payment refunded
Workflow is triggered when a customer refunds a product.
Subscription created
Workflow is triggered when a customers subscribes to your subscription service.
Subscription cancelled
Workflow is triggered when a customer cancels their subscription.
Subscription payment successful
Workflow is triggered when a subscription payment is successful.
Subscription payment failed
Workflow is triggered when a subscription payment fails.
Payment plan completed
Workflow is triggered when a payment plan is completed.
OptimizeMentor
User is added to membership
Workflow is triggered when a customer is added to a membership.
User is removed from membership
Workflow is triggered when a customer is removed from a membership.
OptimizeFunnels
User subscribes through funnel step
Workflow is triggered when a subscriber subscribes through a step inside your funnel.
Actions Currently Available
Along with triggers, we have also included a range of actions that you can use when you immediately fire up OptimizeFlow. Again, we will be expanding on these actions in future updates.
General
Send Webhook
Action sends data to an external service using a Webhook URL.
OptimizeBuilder
Integration Optin
Action sends data to an external email autoresponder service. Works with any of the integrations currently available inside the OptimizePress dashboard.
OptimizeMentor
Add To Membership
Action uses data from a trigger and adds them to a membership.
Remove From Membership
Action uses data from a trigger and removes them from a membership.
How Will You Use OptimizeFlow?
With OptimizeFlow, we have provided you with even more flexibility to control the flow of your business processes.
You now have the freedom to utilize your visitor data to offer further value and open the doors to even more engagement and sales.
We’re very excited to see how you will use this powerful tool in your business. Please let us know in the comments…
Build Landing Pages That Convert with our Inspiration Lookbook...
Unlock Higher Conversion Rates: Get Access to 120+ Landing Page Swipes from Creators, Digital Marketers and Experts in our latest Landing Page Lookbook


Build Landing Pages That Convert with our Inspiration Lookbook
Get Access to 120+ Landing Page Swipes from Creators, Digital Marketers and Experts + insights and steps to boost your landing page conversions.

